
Tips & Tricks – ADDING PICTURES
About This Project
You can send pictures to your Pigeon Digital Photo Frame a few ways.
1) Directly from your Camera Roll – Multiple Upload Friendly!
- Once you’ve taken a picture, simply tap on the “Share” icon.
- Select up to 3 photos to send to the Pigeon Frame.
- In the Activities bar, scroll over to the Pigeon App Icon.
(If you do not see the Pigeon App here, tap on the “More” section and ensure that the Pigeon App is activated).
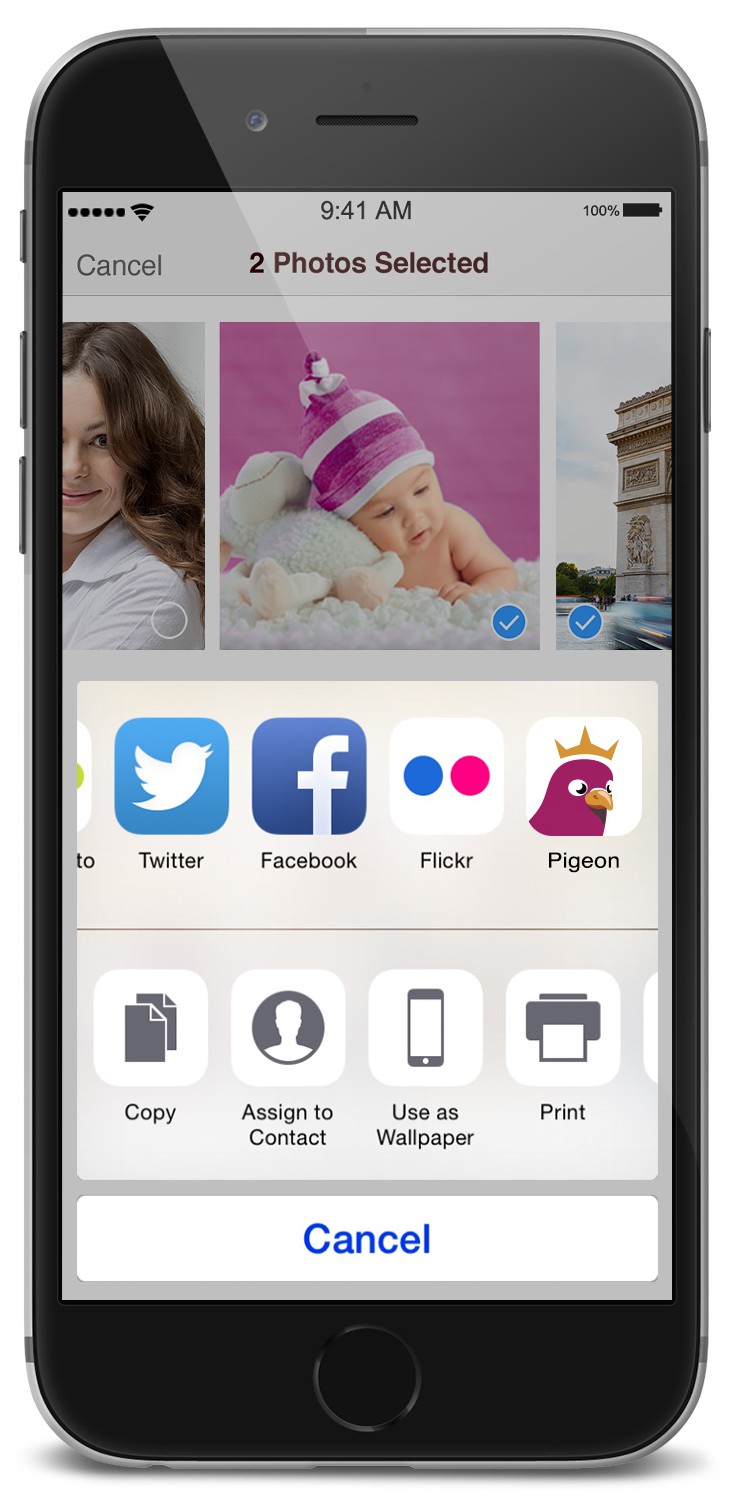
- Tap on the Pigeon icon.
- You will be prompted to “Pick Frame(s)” you’d like to post to.
- Tap on one or multiple Pigeon Frame(s) and a check mark will appear beside the ones the pictures will be sent to.
- Select Post in the upper right hand corner.
2) Directly within the Pigeon App
- When on the home page, select the Pigeon Frame you’d like to send a picture to.
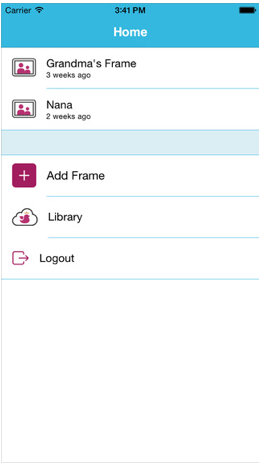
- Once selected, you should see the name of the Frame at the top of your screen.
- Choose the + button.
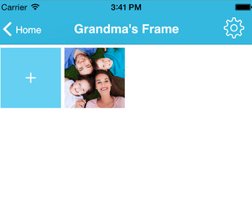
- You will then be prompted to select a single image from your camera roll.
- Choose your image and you will see it appear in your Frame.
NOTE: You will not be prompted to select a Frame as you are already within your chosen frame.
.
Questions?
Email us! We're here to help. contact@pigeonframe.com